
The Ins and Outs of Needle Felting
Anytime you learn a new craft, there’s a whole bunch of information to remember. When you’re knitting, you need to remember the difference between a knit stitch and a purl stitch, how to cast on, how to hold the needles, and a ton of various terms. Every craft has these intricate details that you need to know just to simply get started with the basics.
Needle felting is no different. When I first started, I kept thinking there was SO MUCH stuff to remember and that there was no way I’d be able to. Fortunately, I eventually got it all down and organized in my mind folder. I’m not going to lie, though; it took time.
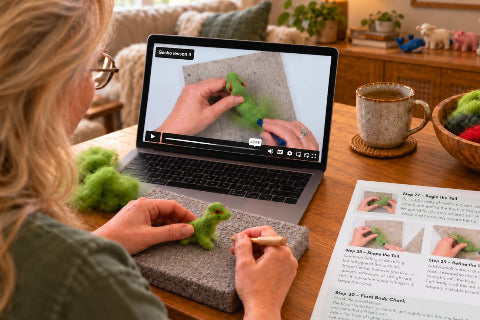
The good news is that I did eventually get it all down, and sharing what I’ve learned has become a big part of Bear Creek Felting. Today I teach through my needle felting kits, the Bear Creek Needle Felting Academy, and in-person classes and retreats in Fort Ransom, North Dakota.
Needle felting is a wonderfully simple fiber art. All you need is some wool, felting needles, and a cushion or Wool Pad and you can make some amazing creations!
The wool used for felting has flat, overlapping scales with edges that point in opposite directions. During felting, the wool is agitated and the edges of the scales connect and lock into position. This happens to hundreds of fibers during the process and causes the wool to felt.
Felting needles have barbs on the end that go in one direction. When the needle stabs into the wool, it is pulled in by the barbs, causing the locking to occur. Always work on a felting cushion or wool pad. It gives you a safe work surface, protects your table, and helps keep the needle from striking a hard surface underneath your project.
The needle felting process starts by stabbing the needle into a bit of wool. Stabbing the wool pulls it into itself. When this happens repeatedly and the wool is turned, it begins to lock together. Eventually, this will become a firm shape. Wool can be added and felted in order to shape the wool into a sculpture.
At Bear Creek Felting, the wool I use for needle felting begins with the sheep on our North Dakota farm and is processed in our own fiber mill in Fort Ransom. I’ve spent years learning which wool, needles and techniques make needle felting easier and more successful, especially for beginners.
If you’re just getting started, you can explore Bear Creek Felting kits, wool and supplies or continue learning through the Bear Creek Needle Felting Academy.