
5 Common Needle Felting Mistakes
5 Common Needle Felting Mistakes Beginners Make—and How to Fix Them
When you’re new to needle felting, a few small mistakes can make the craft much harder than it needs to be.
I’ve been needle felting since 2006 and have taught many beginners over the years. Most of the frustrations I see come back to the same things: the work surface, the needle, the wool, and the way the needle is being used.
Here are five common beginner mistakes—and what to do instead.
1. Felting Without a Proper Work Surface
One of the first things every needle felter needs is a surface to work against.
Trying to felt while holding the project completely in your hand puts your fingers directly in the path of a very sharp needle.
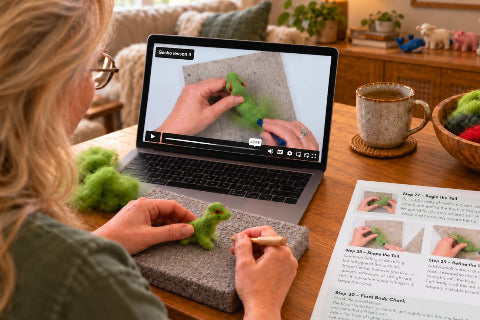
A felting pad gives the needle somewhere to go after it passes through the wool and gives you a stable surface while you work.
I used upholstery foam for years, but eventually switched to wool felting pads because they last much longer and I prefer the way they feel while I’m working.
Whatever type you choose, make sure your project is resting on a felting surface whenever possible.
And remember—a felting pad helps, but it doesn’t make the needle harmless. Always pay attention to where your fingers are.

2. Pushing the Needle Farther Into the Wool Than Necessary
A deeper poke does not automatically mean faster felting.
The barbs that do the felting are located along the working portion of the needle, so you only need to insert the needle far enough for those barbs to engage the fibers you are trying to move.
Short, controlled pokes are usually much more efficient than repeatedly burying the needle deep into the sculpture.
This becomes especially important as your project gets firmer.
Pushing deeply into very dense wool requires more force and can make it easier to bend or break a needle.
Let the needle do the work.
You don’t need to attack the wool.

3. Using the Wrong Felting Needle for the Job
Not all felting needles behave the same way.
Needles come in different gauges, shapes, and barb configurations, and those differences affect how aggressively they move wool.
For much of my sculptural felting, a 36 Star is one of my favorite workhorse needles. It works especially well with the wool I use for building firm three-dimensional shapes.
But one needle isn’t perfect for every job.
As the sculpture becomes firmer or you begin working on fine surface details, you may want a finer needle.
And one important thing to remember about felting needle gauges:
The higher the gauge number, the finer the needle.
So a 40-gauge needle is finer than a 36-gauge needle.
You don’t need a huge collection when you’re beginning. Start with a good general-purpose needle, learn how it behaves, and then add other needles as you understand why you need them.
4. Starting With Wool That Fights You
Wool makes an enormous difference.
One of the reasons I was fortunate when I started needle felting was that I had access to Romney wool. It turned out to be very well suited to the firm three-dimensional sculpture I like to make.
Since then, I’ve experimented with wool from many different breeds, and I’ve learned that there isn’t one simple rule that says a particular breed is always good or bad for needle felting.
The individual fleece and the way the wool is processed matter too.
For a beginner, I would choose wool that grabs easily under the needle and firms without requiring endless poking.
I would also avoid Superwash wool for traditional needle felting. Superwash processing is designed to reduce the natural tendency of wool fibers to felt together, which is exactly the opposite of what we want.
And while some breeds can be wonderful for particular uses, they may have characteristics that make them more challenging. Icelandic wool, for example, contains a soft undercoat called thel and a longer outer fiber called tog. The thel can felt beautifully, while a preparation containing lots of long tog may behave very differently.
The more you work with wool, the more you realize:
Breed matters—but the fleece and preparation matter just as much
5. Prying and Bending With the Felting Needle
Broken needles are frustrating, especially when you’re just starting.
Felting needles are very sharp, but they are also brittle.
The best habit you can develop is:
Straight in. Straight out.
If you insert the needle at one angle and pull it out at another, you put sideways pressure on the shaft.
That is when needles tend to snap.
Also resist the temptation to use the felting needle like a tiny pry bar.
Don’t use it to pick apart dense wool, lift pieces of fiber, or push sideways against the sculpture.
If you see the needle bending while you work, stop and adjust your angle.
And always keep extra needles nearby.
Even experienced felters break one occasionally.
Felting needles also become less efficient with heavy use, so if felting suddenly feels much slower than it should, try a fresh needle before assuming you’re doing something wrong.

A Few Small Changes Make Needle Felting Much Easier
Needle felting has a very simple basic technique:
Take wool and repeatedly poke it with a barbed needle.
But there is a big difference between simply poking wool and understanding how your tools and fiber work together.
Use a good felting surface.
Don’t bury the needle unnecessarily.
Choose a needle that matches the job.
Start with wool that felts willingly.
And keep that needle moving straight in and straight out.
Those simple habits can eliminate a lot of the frustration beginners experience.
And once you aren’t fighting your tools and materials, you can concentrate on the fun part:
turning a pile of wool into something you imagined.
Lorem ipsum dolor sit amet, consectetur adipiscing elit, sed do eiusmod tempor incididunt ut.