- Home
- /
- Products
- /
- Needle Felting Supplies
- /
- Felting Needle Holders
- /
- Multi Needle Felting Tool


Multi Needle Felting Tool
$29.00
The Multi Needle Tool holds from 1 to 6 felting needles in any required configuration allowing easy, fast and safe insertion and removal of needles. (needles sold separately)
SPECIFICATIONS
Additional information
| Weight | .6 oz |
|---|---|
| Dimensions | 3 × .5 × .5 in |
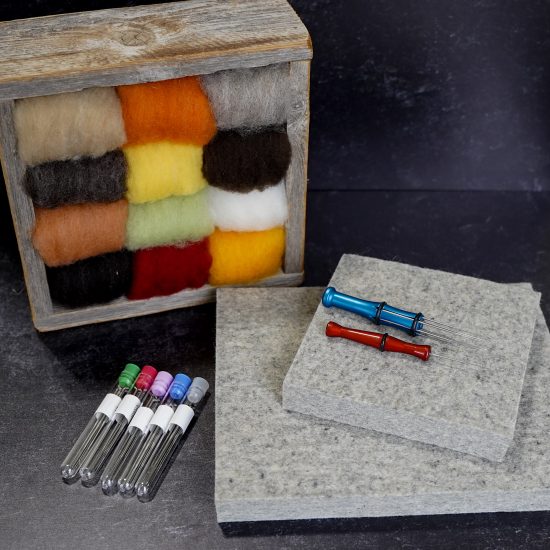
| Color | Blue, Gold, Polished Silver, Anodized Red |
ABOUT THE PRODUCT
I have tried many needle holders over the years and this is the tool I recommend for all of my needle felting students.
The Multi Needle Tool holds from 1 to 6 felting needles in any required configuration allowing easy, fast and safe insertion and removal of needles.
I recommend using size 38 needles with this tool. Needles are not included with this tool; they must be purchased separately.
The ergonomic design ensures that the tool fits the user’s hand comfortably, with the entire needle shank held within the tool, providing the shortest distance between fingers and felt. Requiring minimal gripping effort, this tool provides you with a high level of control and precision in your work.
The design also ensures that all the needles are held exactly parallel, eliminating divergence of the needles, reducing the effort required and minimizing needle breakage. The tools unique roll resistance means it stays where you put it without rolling off the table.
Needle placement description.
Warning the needles are very sharp.
Always Have the holder pointing away from your body when inserting or removing needles.

To insert needles
First support the holder in both hands with the slotted end away from your body. Use both thumbs to roll the middle “O ring” from its groove and slide the ring towards the head of the tool till it almost reaches the front “O ring”.
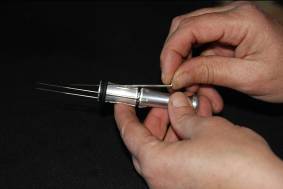
Next
Hold the needle by its head and slide the needle away from you under both rings. When the head of the needle lines up with the “O ring” groove rotate the head into the groove.
Last step
Slide the “O ring” back into its groove covering the needle heads. Roll the tool between your fingers to push needle heads into the bottom of the groove.
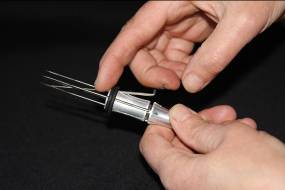
To remove needles
Roll and slide centre “O ring” away from you as before, now apply light pressure to the needle towards the middle of the tool where the needle protrudes from the holder, this will lift the needle head from its groove allowing the needle to be withdrawn.
Maintenance
A Very light spray then wipe with CRC, WD40, or similar lubricant will protect and nourish the rubber “O rings” and assist in preventing corrosion of the needles
Most Viewed Products
-
 Best Seller
Sheep Needle Felting Kit (Easy Beginner)
Price range: $33.00 through $49.90 -
 Best Seller
Snowman Needle Felting Kit (Super Easy Beginner)
Price range: $37.50 through $59.00 -
 Best Seller
Black Sheep Needle Felting Kit (Easy Beginner)
Price range: $33.00 through $52.60 -
 Best Seller
Pumpkin Needle Felting Kit (Beginner)
Price range: $17.50 through $34.40 -
 Best Seller
Bunny Needle Felting Kit (Advanced Beginner)
Price range: $20.80 through $37.70 -

Duckling Needle Felting Kit
Price range: $21.95 through $38.85